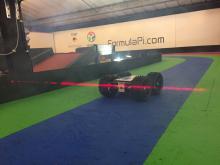
Hi, I've just seen this project, and I realised that it is pretty similar to something I'm building. While I was looking at the pictures posted on the racing code, I saw that this robots are capable of distinguish the edges of the road and extracting the points that belong to them.
What I'm building is kind of an autonomous car, and I am able to extract the lines of the road from the rest of the image, but now I need a way to transform that lines (or curves) of the image into a set of points, in order to use them.
Could you please tell me how to do that? Or tell me what kind of cv functions should I use?
Thank you very much, I'm waiting for your response ^^
Images:

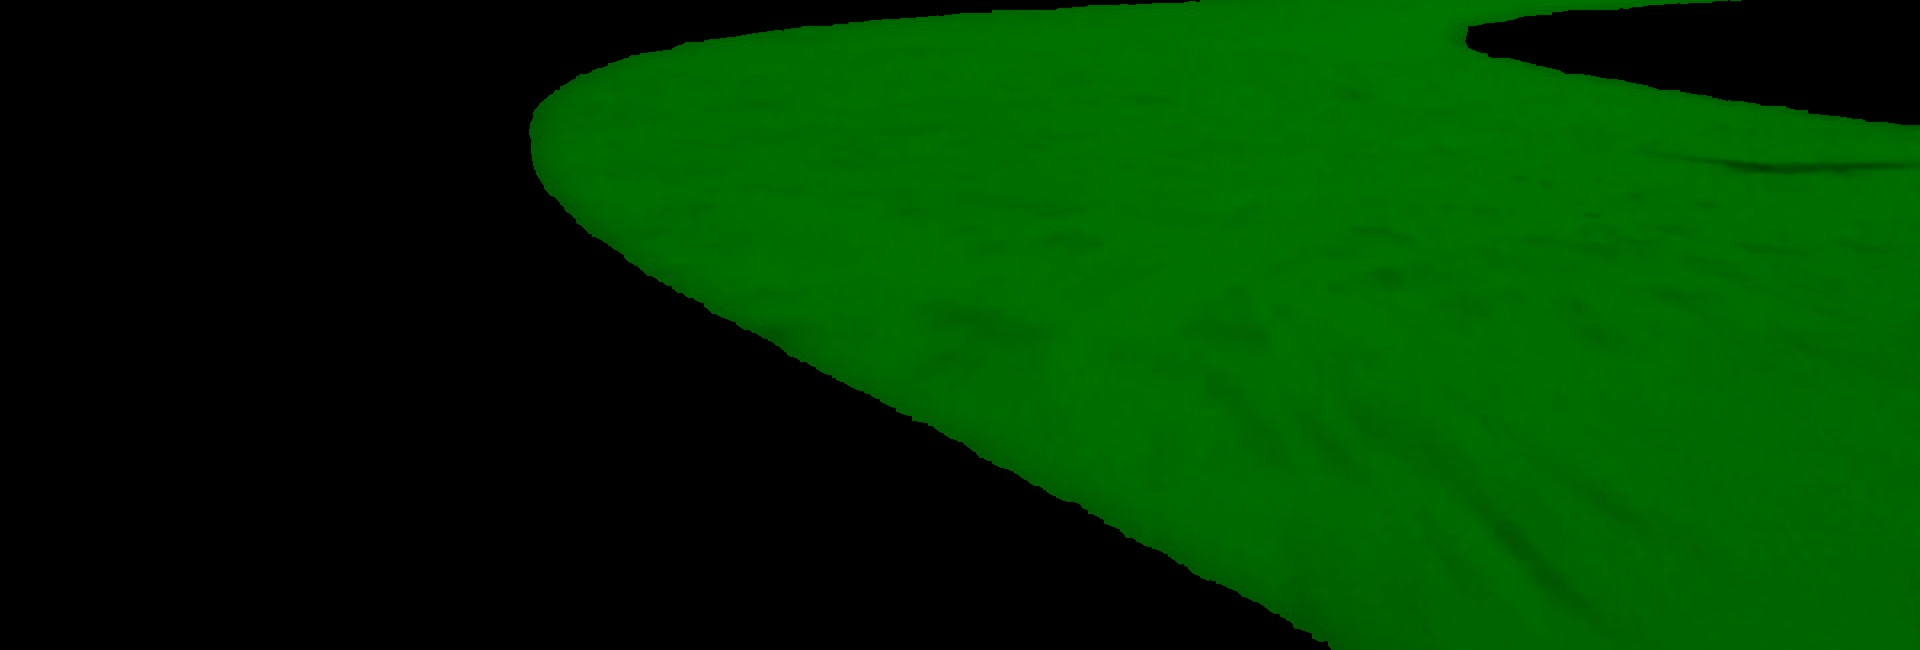
I presume you are starting from a masked image, say something like this:
There are a few different ways of doing this, this is one of the methods we have used.
Before doing either you will want a grayscale image of the line.
We can get this using:
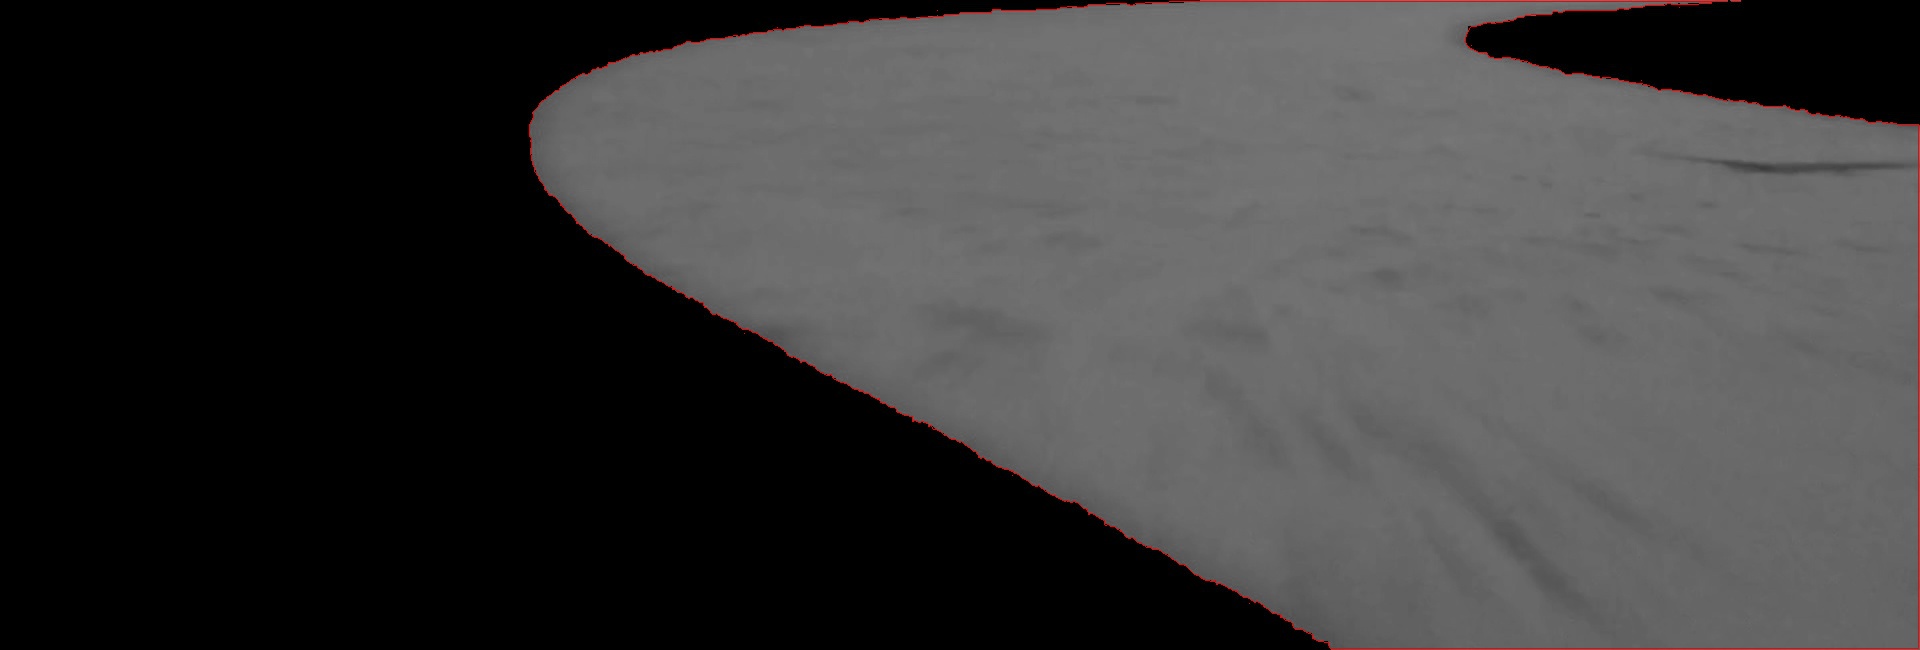
This method involves getting OpenCV to find contours in our image.
These are places where the level changes.
We can do this with:
To see what was found we can plot the contours like this:
contourImage = image.copy()
plotColour = (0,0,255) # Red
cv2.drawContours(contourImage, contours, -1, plotColour, 1)
cv2.imwrite('contours1.jpg', contourImage)
In our case we get this:

We can do a bit better by removing low-level noise from the image first:
This gives us:
which is a lot cleaner.
The contours list is actually a set of points, but it is rather complicated.
First we want the longest contour only:
bestMatch = contour[0]
for contour in contours:
    if len(contour) > len(bestMatch):
		bestMatch = contour
We can make a simple plotting function like this:
And what we get is:
pointsImage = numpy.zeros_like(image) # Gives a black image of the right size
plotPoints(pointsImage, bestMatch, plotColour)
cv2.imwrite('points.jpg', pointsImage)
The good things about this approach:
cv2.approxPolyDPfunctionThe bad things about this approach:
This can be fixed by changing the 'bestMatch' logic
This can make subsequent processing more accurate but much slower
Our blog will have some more posts about how we can get parts of the image processing to work over time.
Alternatively posts tagged with image-processing will contain details either about processing in general or our standard example code.
From any of the articles you can subscribe to email notifications for new content.
Thank you very much for your response! Now I see why you work with a road made of changes of colours.
At this moment, I'm working with 2 stripes, through which the car has to drive. But now I realise this is not the best way to make a road easier to be detected.
Add new comment